Thursday, October 1, 2020

Fresh Pumpkins: How to Bake


Fresh Pumpkins: How to Bake

 Nothing says fall like fresh pumpkins and harvesting pumpkins from a local patch brings the freshness right to your table.

Iowa has more than 38 pumpkin patches devoted to raising pumpkins.  They are nutritious and delicious.  There are many recipes for using the pumpkin pulp (and many for using the pumpkin seeds - but I've never had the patience to clean the seeds from the stringy fibers from the inside of the pumpkin).

Acres devoted to pumpkin patches rose from a few acres over 300 in 1989 and now the acres on which pumpkins are grown are over 1000.

Once you have selected your "pie pumpkins" wash the exterior and make a knife sized slit in one of the sides of the pumpkins -- not crucial if you forget to make the slit but it will be easier to cut, and will allow the steam from the inside to escape as the pumpkin cooks in the microwave.

Place the pumpkin into a microwave and cook for 4-6 minutes.  Those few minutes will make the shell much easier to cut.  Once the pumpkin has been removed from the microwave allow it to cook, and then cut the pumpkin in half.

Scoop out the seeds and fiber strings that are on the inside of the pumpkin.  I generally use a ice cream scoop -- not a scoop that is like a melon ball scoop but more of a curved flatish type of scoop.  If some fibers remain it might be necessary to scrap them away from the flesh with a paring knife.  But just cut the fibers and scoop.

Actually you might feel you need to clean these completely out - but its really not necessary.  Just make sure the seeds are out. 

Turn the pumpkin halves onto a cookie sheet (there will be some pumpkin water seep out so make sure you have sides on the pans).

Bake at 400 degrees for 1/2 hour to 45 minutes.  The size of the pumpkin will determine exactly how long.  If you have a convection oven that speeds up the process.  When the skin of the pumpkin is shiny looking and begins to pucker the pumpkin is done.


The pumpkin shell looks almost as if someone has brushed oil onto the shell but no one has, it is simply the result of having cooked the pumpkin. 

As the pumpkin coos a bit, the pumpkin skin (shell) begins to pucker. 

Insert a knife or something into one of teh shell's puckers and begin to peel the pumpkin shell away from the pulp. 

The flesh of the pumpkin is the part of the pumpkin that will be put in the food processor to be made into pumpkin puree.  This pumpkin will be package into bags with 2 cups of pumpkin, and others with 4 cups of pumpkin puree.   
If you use fresh pumpkin in any recipe delete some of the other liquid called for in the recipe as fresh pumpkin is not as compacted as commercial canned pumpkin.


From about 10 pumpkins I was able to package 38 cups of fresh pumpkin for freezing.  This pumpkin will make the very best pies, pumpkin rolls, and other pumpkin treats.

The recipes linked above are great recipes.  Explore the home site and find out other information about pumpkins.

As you enjoy some pumpkin pie - enjoy some of my favorite read alouds.  Classics from your library (Pumpkin Books Bibliography).
To cite this post --
McElmeel, Sharron. (2020). Fresh pumpkin - how to bake.  GreenFrogGifts Blog. http://bit.ly/bakingpumpkins

-----------------------------
Green Frog Gifts -- unique gifts -- sewing and cooking

Monday, August 3, 2020

Making Cabbage Rolls or NOT!

So when someone gets a nice big head of cabbage, some fresh tomatoes, and green pepper, and some garden fresh onions - what does one do.  Make cabbage rolls of course.
So I set out to do just that.  I washed the produce - chopped the pepper, tomatoes, and onion.  I had previously put the hamburger in the crockpot to cook with tomatoes and the onion.  I cooked rice in tomato juice -- everything was prepared and so I began...

I boiled the cabbage leaves so they would be nice and rollable (is that a word?).  Cut out the large hard stem down the middle - then I laid a leaf down and started the filling.


This picture was more what I envisioned ... but my culinary skills do not match my mental image.

I filled several but they were not holding together well at all.  I needed help.  But no one was around. 

So I decided the ingredients might look better as a casserole (and the ingredients would taste the same right?)

 A layer of cabbage, the rice and filling, and another layer of rice and then the cabbage.
Garnish with a sprikle or two of pepper and tomato -- ready to finish off in the oven.
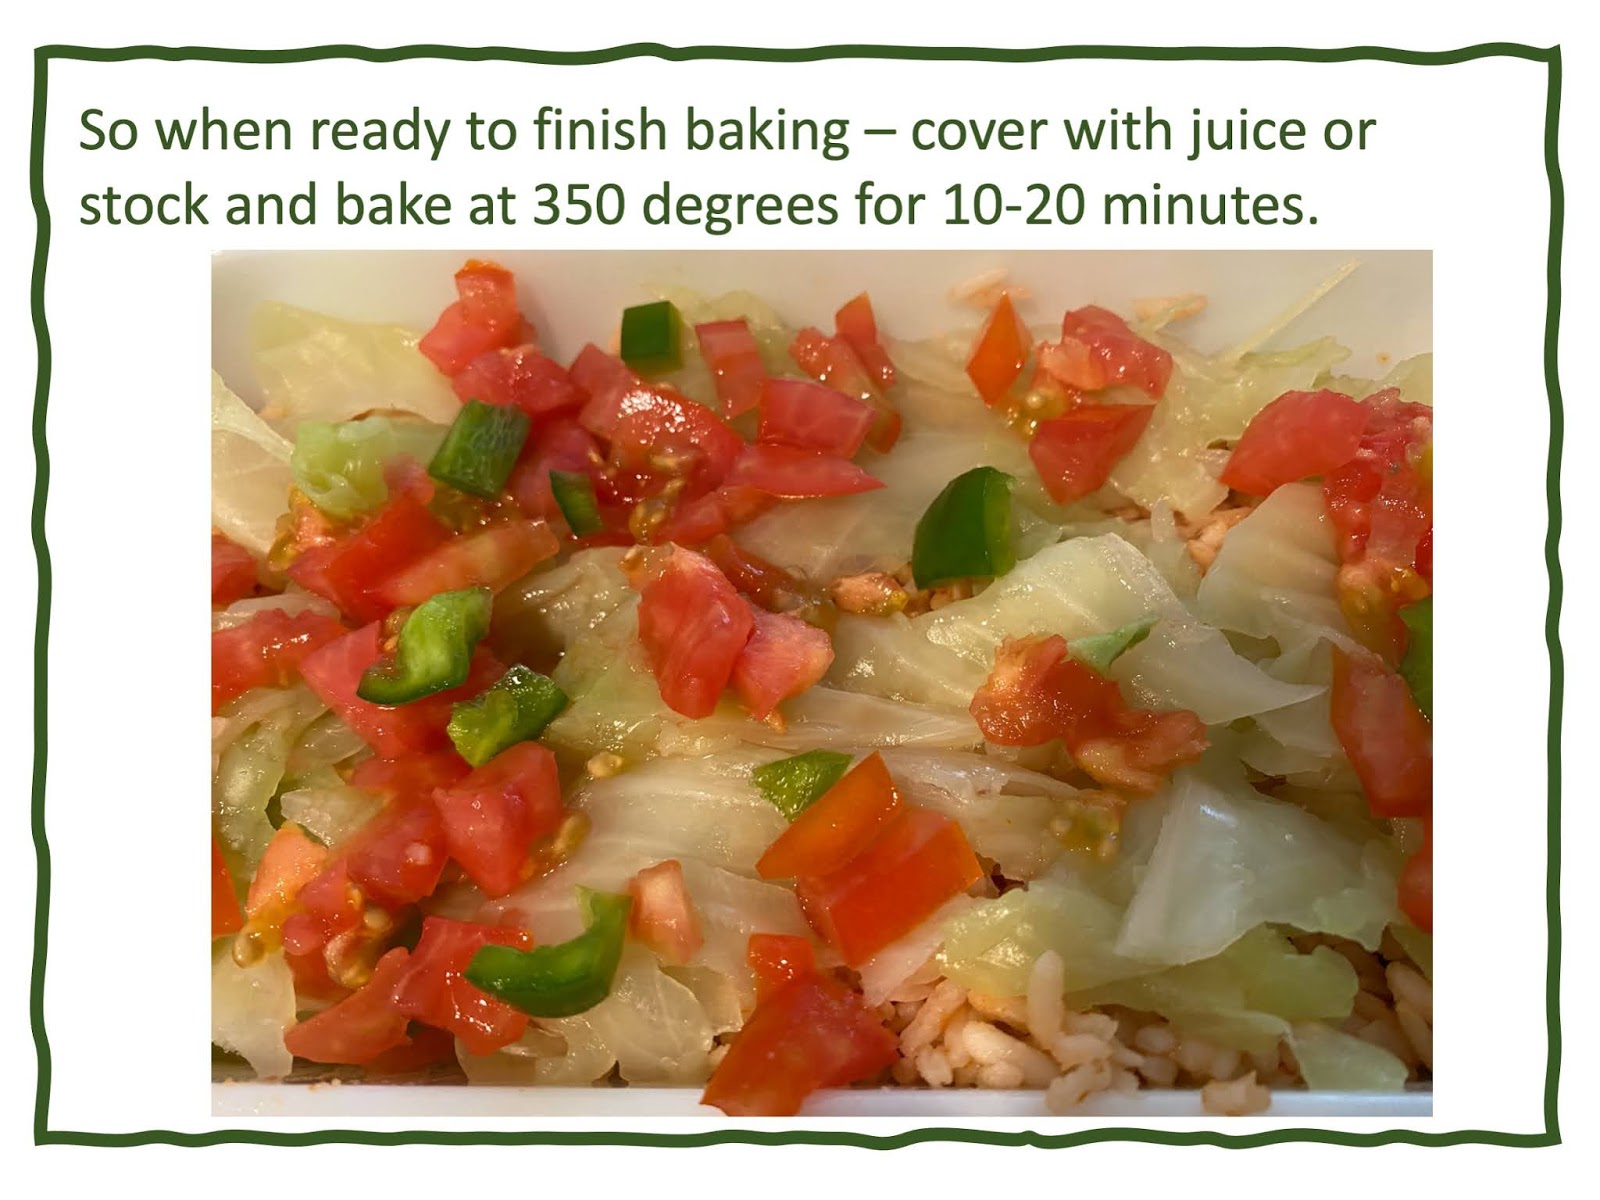
Cover with tomato juice or vegetable stock, and bake at 350 degrees for 10-20 minutes.


Tuesday, July 7, 2020

Paper Crane Quilt Block

Inspired by the paper cranes sent to me by Tony Pope, I decided to create a paper crane quilt block.  This block could be incorporated into a quilt, become the center piece for a pillow top, a place mat, table topper, or a table runner.


This is my block, and this is how I made it.
Choose your background fabric and cut your square, octagon, or any shape/size you wish.  If you are going to use this block for a table topper, place mat, or other small piece you may want to cut an appropriately-sized piece of batting for the underside of this block.


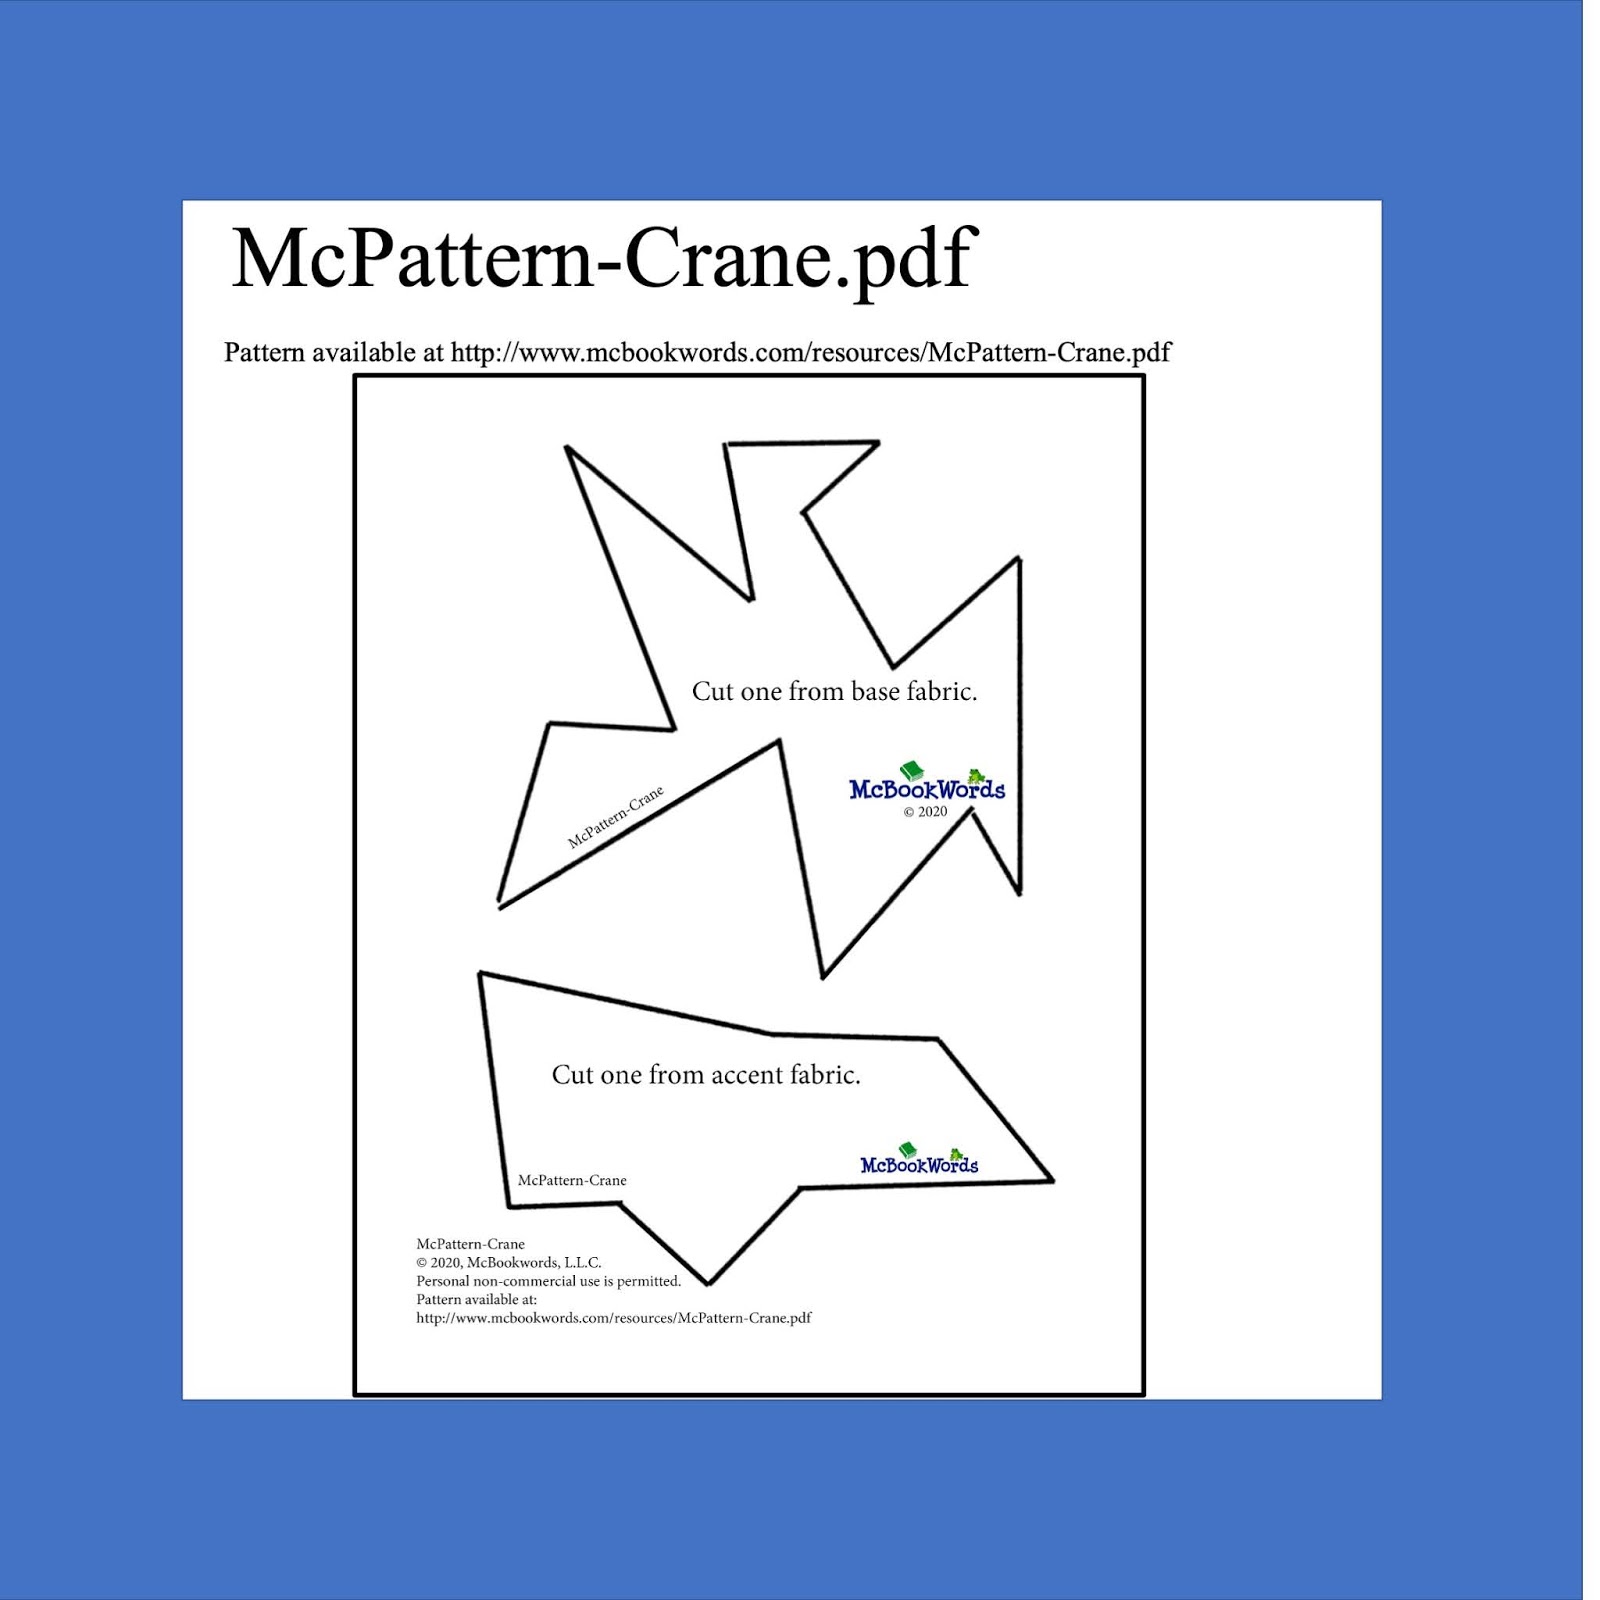
Your background fabric may be any color/pattern you wish but we suggest a contrasting solid or small pattern.  If your crane will be a small pattern or solid color you may wish to choose a more dramatic background.  The darker three sections of the crane (shown in slide 2) may be a highly contrasting pattern or a solid color.  However, if you like all the pieces may be one pattern and if so just use the above slide as your pattern - enlarge it to the size you wish the crane to be, follow the fusing instructions in slide #4 below and then stitch the folds as shown in slide 6.

(PDF) www.mcbookwords.com/resources/McPattern-Crane.pdf
Coordinating scrap material can be utilized for creating the two crane pieces.  If you wish your crane to be larger than 9 x 10 inches simply enlarge both pattern pieces to the size you wish to have.  The remaining directions will be the same regardless of the size of the pieces.


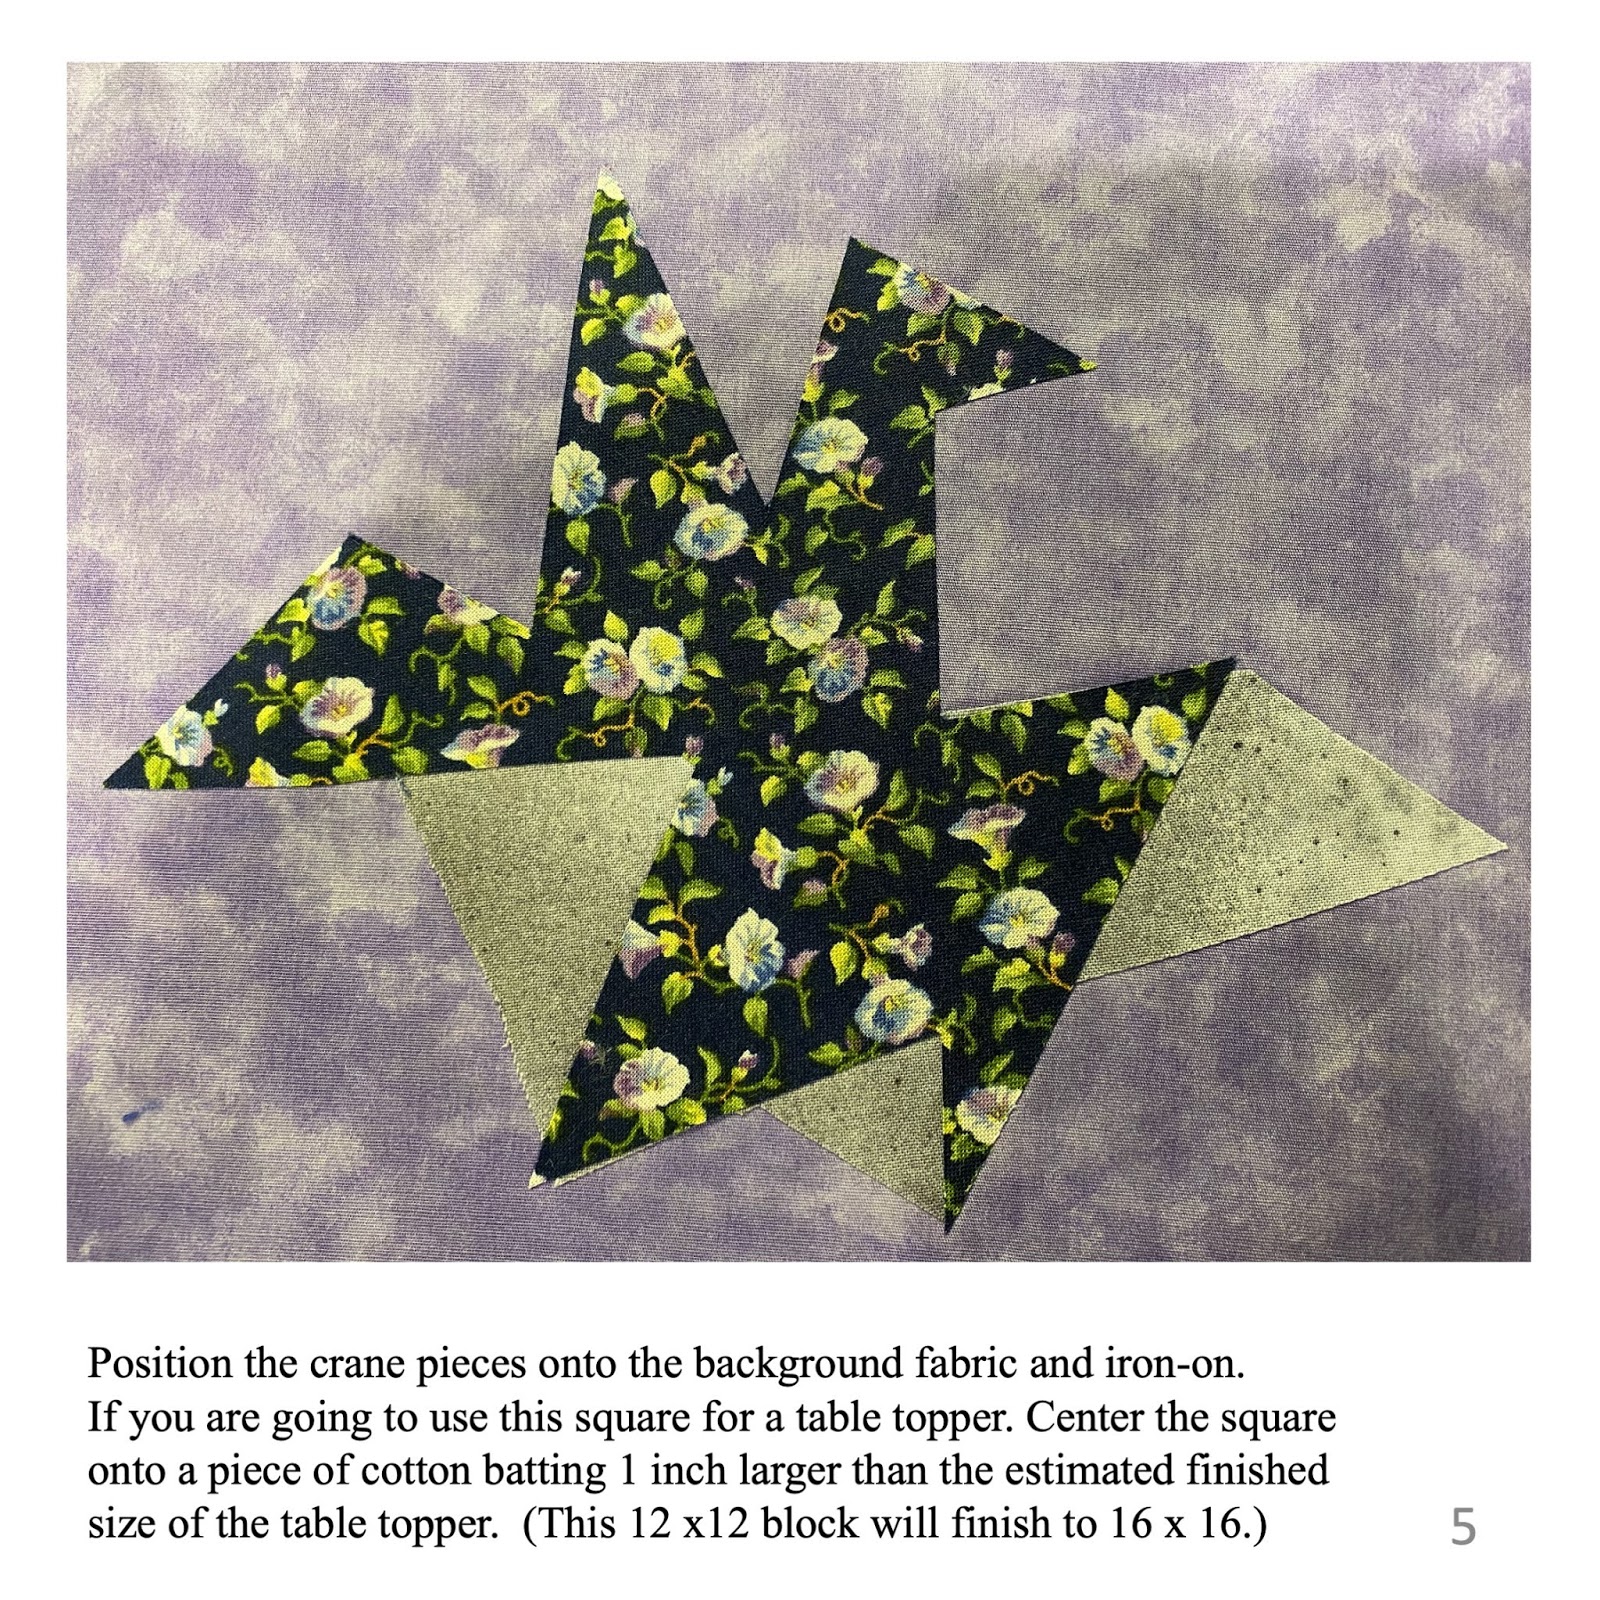
The stitching will emulate the folds on a traditional folded crane.
Borders can be added to the finished block to enlarge its size or to create a pillow top, or any type of table accessory.

Example of a finished table topper where this crane block was used as the focus block for a "Wonky Block" with a 2 inch border around the edge of the block.  "Big Wonky Quilt Block - Easy Quilt Block Tutorial.  Find at http://bit.ly/bigwonkyblock.

McElmeel, Sharron (2020) Paper Crane Quilt Block. McBookwords. http://bit.ly/papercraneblock.

-----------------------------
Green Frog Gifts -- unique gifts -- sewing and cooking

Sunday, July 5, 2020

Strawberries - Strawberries

All Things Strawberry

-----------------------------
Make a table topper or table runner using a basic block designed to highlight a focus fabric.  This fabric block is created with a strawberry fabric and 1/2 triangle squares.  For the basic square you will need four 1/2 square triangle squares to create one block.

Get the instruction page by clicking on this page.


Sew the four resulting blocks back together with a 1/4 inch seam allowance.  Then create your block or running by adding borders, additional blocks.  Be creative and create something unique.


Use your "new" table topper to feature strawberry dip.  The recipe (and books to read) at http://bit.ly/honey-gingerbread

Or make Little Red Hen's Magnificent Strawberry Shortcake -- find the recipe at http://bit.ly/LRH-shortcake -- and enjoy 

Or make some strawberry rhubarb jam - find out more at http://bit.ly/rhubarbtime.
If you make this jam and want labels for your jam jars, this image can be used on Avery labels (12 circle labels to a page) to create a page of labels (2.1 x 1.9).  Print, and affix to the top of the jar lid.
-----------------------------
Green Frog Gifts -- unique gifts -- sewing and cooking

Monday, April 13, 2020

Building Readers -- One Baby at a Time

Books and Babies

"Research shows that reading aloud is the single most important thing you can do to help a child prepare for reading and learning," and "More than one in three children arrive at kindergarten without the skills necessary for lifetime learning." ~ www.readaloud.org
These two statements alone should convince parents (and the village that surrounds these children) that reading aloud is important.  All children need a village to encourage them in their pursuit of lifeskills.  Reading and all things related to literacy is important.  To that end whenever I give a baby gift, I include a book, sometimes a stuffed animal, and often a flannel blanket that I have made.  Books are an important part of the present.  Including a gift for the child sends a message to the parents to affirm their own idea that books are important - -and to the child who will be the recipient of the gift.  Make a statement -- reading is important -- give a book.  And consider including a copy of this Read Aloud brochure with each gift.  So here are some ideas...  
Lee Bennett Hopkins is a poet who is so respected for his own poetry collections as well as an anthologist, this 2015 collection Lullaby & Kisses Sweet: Poems to Love with Your Baby; with illustrations by Alyssa Nassner (Abrams Appleseed, 2015).  This book has a velvety soft cover, and a board book construction -- very well suited to young hands who will enjoy hearing this book read aloud time after time.

The bear motif cloth seems to be just right for this lullaby collection.  Soft green minky fabric was used for the back of the blanket, and the quilted blanket was edged in a darker green, white polka dot binding.  The back of the burp cloth and the bibs are a small white dotted green flannel.

In most cases, if I know the name of the baby, I create a small tab with the babies name and sew it into the binding making the blanket one that can be taken to daycare without any further marking.


These books and animals were chosen because I just liked the books. The baby chick fabric is a Robert Kaufman fabric - Urban Zoologie Mini Birds Spring in 100% cotton flannel.  Several stores carry this fabric.
The backing for the blanket is a rosette minky officially referred to as "minky swirl fabric."  I purchased the fabric in the hot pink minky rose swirl fabric and the light pink minky rose swirl, as well as a lime green minky swirl fabric.

I found a 100% cotton pink flannel with large white polka dots which I used to back the bib and burp cloth.  The bib pattern is included at the end of this blog; but the flannel burp cloth is simply a rectangle -- with flannel front and back finished at 8 1/2 inches x 17 inches.  So cut the rectangle to accommodate the seam that will need to be sewn.  I generally sew the items right side together, leaving an opening to turn the item so that the right sides are out, and then top stitch the outer edge of the seams.
With this gift, I actually included a very small blanket for an older sister's doll and included the second animal and book set, for the older sister.

The bird theme would lend itself to connecting the fabric gifts to favorite bird books.  Suggestions: You Nest Here With Me and Where Do Birds Live?


 Packaged and ready to be given.  I have started to create quilted cards to accompany the packages that I send.  The cards are created by sewing small pieces of the cloth used to create the gift.

I actually purchased the boxes I am using as the packaging but think I will attempt to use sturdy shoe boxes to decorate and wrap for the next gifts.  I'll see how that goes.

 If the child is a little older there might be some other items that could be gifted.  In this case a sundress created from a purchased t-shirt (to coordinate with an organization the parents were involved in), added fabric shoulder straps, ruffles, and matching bloomers.  I made a quilted card to coordinate with this gift and added a book.  Thematic books celebrating the patriotic Red, White, and Blue philosophy would be another good choice.  Janeczko's Firefly July, with illustrations by Melissa Sweet would be a great choice.  The book of poems provide poems that can be read during several sittings or all at once.  And Ryan's Flag that I love is an information book about the symbol of our patriotism -- a win-win in terms of books that celebrate our country and literacy.


The next time you find a baby in your life - consider giving a book with your gift; and with every other gift that you organize for any child in your life.

If you are interested in making a bib - you might wish to use this pattern.  When you download the pattern the square should measure 1 in x 1 in.  The x is where you will attach the velcro fastener strip.
As mentioned above the flannel burp cloth is simply a rectangle -- with flannel front and back finished at 8 1/2 inches x 17 inches.  So cut the rectangle to accommodate the seam that will need to be sewn.  I generally sew the items right side together, leaving an opening to turn the item so that the right sides are out, and then top stitch the outer edge of the seams.  The larger blanket is a square made the width of the fabric - two coordinating pieces quilted or tied and bound.  Obviously if you do not sew you might wish to select a purchased gift and find a book that coordinates with the theme -- or just enclose one of your favorites.
-----------------------------
Green Frog Gifts -- unique gifts -- sewing and cooking
https://www.etsy.com/shop/GreenFrogGifts